
December 27, 2023
How to Remove Floor Tiles: Step-by-Step Guide
When it comes to removing tiles from a floor, there are several important things to keep in mind. First and foremost, it’s crucial to follow proper procedures to avoid any damage to the surrounding area or yourself. Secondly, the process of removing tiles can be quite time-consuming and may require some physical effort. But don’t worry, with the right tools and materials, as well as a little bit of patience and caution, anyone can successfully remove tiles from their floor. In this guide, we’ll walk through each step of the process, from preparing the work area to cleaning up afterwards. So let’s get started!

To properly remove tiles from a floor, it is important to have the right tools and materials on hand. This includes a jackhammer, a hammer, cold chisel, PPC clothing, rubbish bin, floor scraper, broom, and a shovel. It is also important to wear safety goggles and gloves when working with these tools, sharp pieces of tile can splinter and be as a projectile. When gathering these materials, it is important to take safety precautions such as wearing protective clothing and ensuring that children and pets are kept away from the area. It is also important to follow any local regulations regarding the disposal of old adhesive and tiles.

To prepare the work area for removing tiles from a floor, there are several important steps that need to be taken. First, create a safe and clean workspace where you can easily access all the tools and materials you’ll need. This may involve moving furniture or other items out of the way, so be sure to plan ahead and make any necessary arrangements.
Next, protect surrounding areas from debris and dust by covering them with drop cloths or plastic sheets. This will help keep the floor clean and prevent any damage to nearby surfaces. It’s also a good idea to lay down a few layers of masking tape around the perimeter of the work area to hold back any loose material and keep it contained.

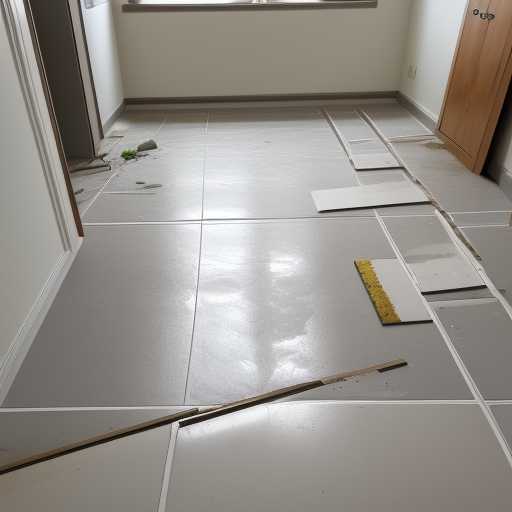
Removing the tiles before removal is an essential step in the process of removing tiles from a floor. This step helps to ensure that the tiles come out easily and without causing any damage to the surrounding area. The following techniques can be used to loosen tiles:
1. Using a Notched Trowel: A notched trowel can be used to loosen the tiles by applying pressure to the back of the tile while sliding the trowel along the edge of the tile. This technique works best for smaller tiles and can be repeated until the tile is loose enough to be removed.
2. Hammer and Chisel: A hammer and chisel can be used to loosen larger tiles that are difficult to remove with a notched trowel. The hammer should be used to tap gently on the back of the tile, while the chisel is used to carefully chip away at the adhesive that holds the tile in place.
3. Score and Snap: This method involves scoring the adhesive around the edges of the tile with a utility knife, then snapping the tile free with a pair of pliers. This technique is effective for large tiles and requires patience and careful execution.
4. Heat: Applying heat to the adhesive can help to loosen tiles that are particularly stubborn. A hair dryer or propane torch can be used to heat the adhesive, although care must be taken to avoid damaging the surrounding area.
5. Chemicals: In some cases, chemicals such as methylene chloride or acetone can be used to dissolve the adhesive and loosen the tiles. However, these chemicals are hazardous and should only be used with appropriate safety equipment and in a well-ventilated area.
It is important to be gentle when loosening tiles to avoid cracking or breaking them. Taking your time and using the appropriate technique for the size and type of tile will help to ensure a successful removal process.

Old adhesive can be a major obstacle when it comes to removing tiles from a floor. It can cause the tiles to become stuck and difficult to remove, which can lead to damage to the tiles and the floor. To ensure a successful tile removal process, it is important to properly remove old adhesive before proceeding with the rest of the steps. In this section, we will discuss the steps involved in safely removing old adhesive from a floor.
Using a heat gun to remove old floor tile adhesive Is a process that requires careful attention. To avoid damaging the tiles or the grout And to ensure a smooth removal of the adhesive It’s important to follow these steps with precision First, turn on the heat gun and let it warm up Then, carefully apply it to the adhesive Holding it at a distance from the surface And moving it in a circular motion Be patient and keep an eye on the progress As the adhesive starts to loosen and lift Continue applying heat until it’s all removed And then clean up any remaining debris With a damp sponge and some mild soap And the job will be done with ease

After removing the tiles, it is important to thoroughly clean up the area to prevent any future problems. First, use a wet/dry vacuum to remove any debris and dust left behind from the tiles and adhesive. Then, use a scrub brush and mild cleaning solution to clean the floor and remove any remaining dirt or stains. Be sure to rinse the floor thoroughly with water and allow it to dry completely before walking on it or placing furniture back in the room. It is also recommended to seal the floor after cleaning to protect it from future staining and damage.
Removing tiles from a floor requires careful planning and attention to detail. By following the step-by-step guide outlined in this article, homeowners can successfully remove tiles without causing damage to their floors. It is important to remember that rushing through the process can lead to costly repairs in the long run. Therefore, it is recommended to take the time to properly prepare and execute each step, and to seek professional assistance if needed. With patience and care, anyone can successfully remove tiles from their floor.


